Initial setup of Odoo Accounting and Odoo Invoicing
When you first open your Odoo Accounting app, the Accounting Overview page welcomes you with a step-by-step onboarding banner, a wizard that helps you get started. This onboarding banner is displayed until you choose to close it.
The settings visible in the onboarding banner can still be modified later by going to .
Note
Odoo Accounting automatically installs the appropriate Fiscal Localization Package for your company, according to the country selected at the creation of the database. This way, the right accounts, reports, and taxes are ready-to-go. Click here for more information about Fiscal Localization Packages.
Accounting onboarding banner
The step-by-step Accounting onboarding banner is composed of four steps:
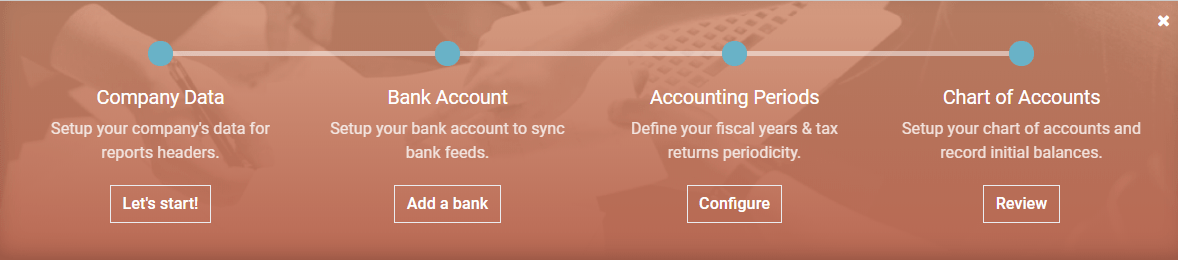
Données sur la société
This menu allows you to add your company’s details such as the name, address, logo, website, phone number, email address, and Tax ID, or VAT number. These details are then displayed on your documents, such as on invoices.

Note
You can also change these settings by going to and clicking on Update Info.
Compte bancaire
Connect your bank account to your database and have your bank statements synced automatically. To do so, find your bank in the list, click on Connect, and follow the instructions on-screen.
Note
Click here for more information about this feature.
If your Bank Institution can’t be synchronized automatically, or if you prefer not to sync it with your database, you may also configure your bank account manually by clicking on Create it, and filling out the form.
Nom : le nom du compte bancaire, tel qu’il est affiché sur Odoo.
Numéro de compte : votre numéro de compte bancaire (IBAN en Europe).
Banque : cliquez sur Créer et Modifier pour configurer les coordonnées bancaires. Ajoutez le nom de l’établissement bancaire et son code d’identification (BIC ou SWIFT).
Code : ce code est le code abrégé de votre Journal, tel qu’il est affiché sur Odoo. Par défaut, Odoo crée un nouveau Journal avec ce code abrégé.
Journal : ce champ s’affiche si vous avez un journal bancaire existant qui n’est pas encore lié à un compte bancaire. Si oui, alors sélectionnez le Journal que vous souhaitez utiliser pour enregistrer les transactions financières liées à ce compte bancaire ou créez-en un nouveau en cliquant sur Créer et Modifier.
Note
You can add as many bank accounts as needed with this tool by going to , and clicking on Add a Bank Account.
Click here for more information about Bank Accounts.
Périodes comptables
Define here your Fiscal Years’ opening and closing dates, which are used to generate reports automatically, and your Tax Return Periodicity, along with a reminder to never miss a tax return deadline.
By default, the opening date is set on the 1st of January and the closing date on the 31st of December, as this is the most common use.
Note
You can also change these settings by going to and updating the values.
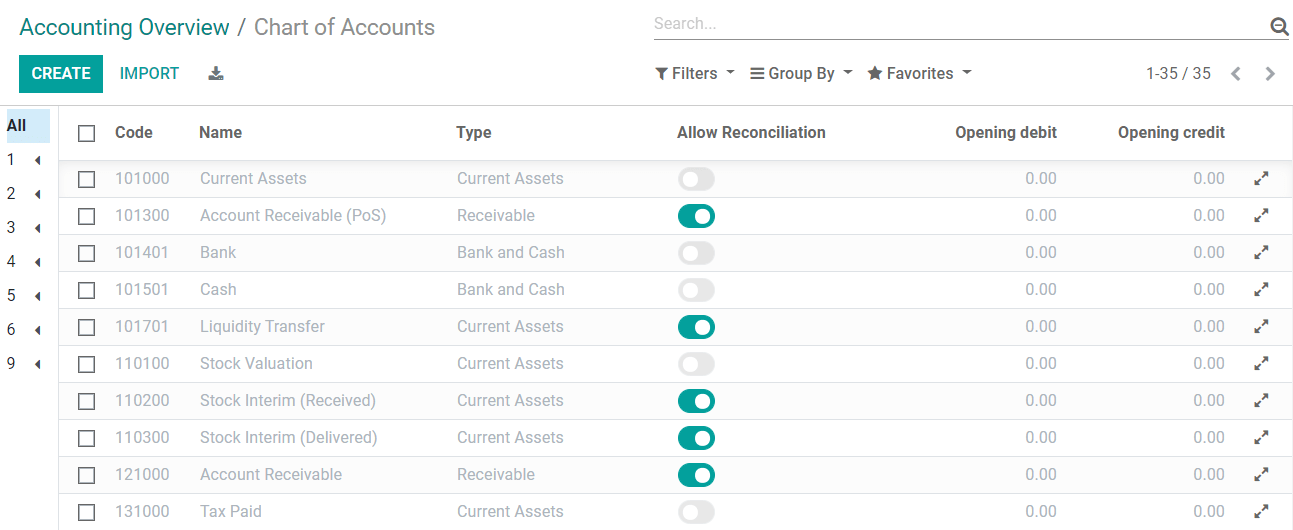
Plan comptable
With this menu, you can add accounts to your Chart of Accounts and indicate their initial opening balances.
Basic settings are displayed on this page to help you review your Chart of Accounts. To access all the settings of an account, click on the double arrow button at the end of the line.
Note
Click here for more information on how to configure your Chart of Accounts.
Invoicing onboarding banner
There is another step-by-step onboarding banner that helps you take advantage of your Odoo Invoicing and Accounting apps. The Invoicing onboarding banner is the one that welcomes you if you use the Invoicing app rather than the Accounting app.
If you have Odoo Accounting installed on your database, you can reach it by going to .
The Invoicing onboarding banner is composed of four main steps:
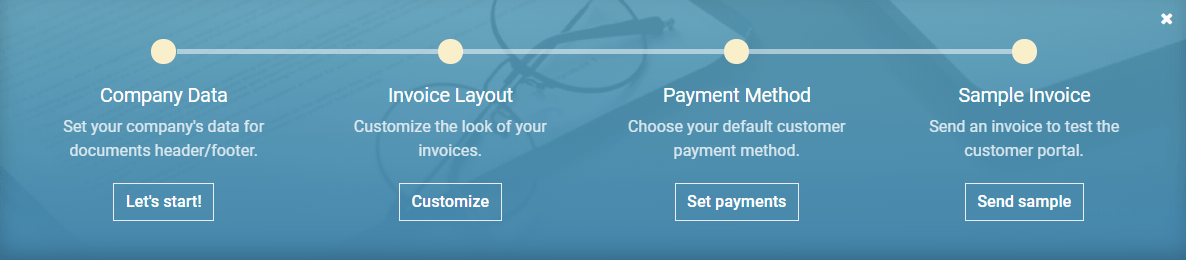
Données sur la société
This form is the same as the one presented in the Accounting onboarding banner.
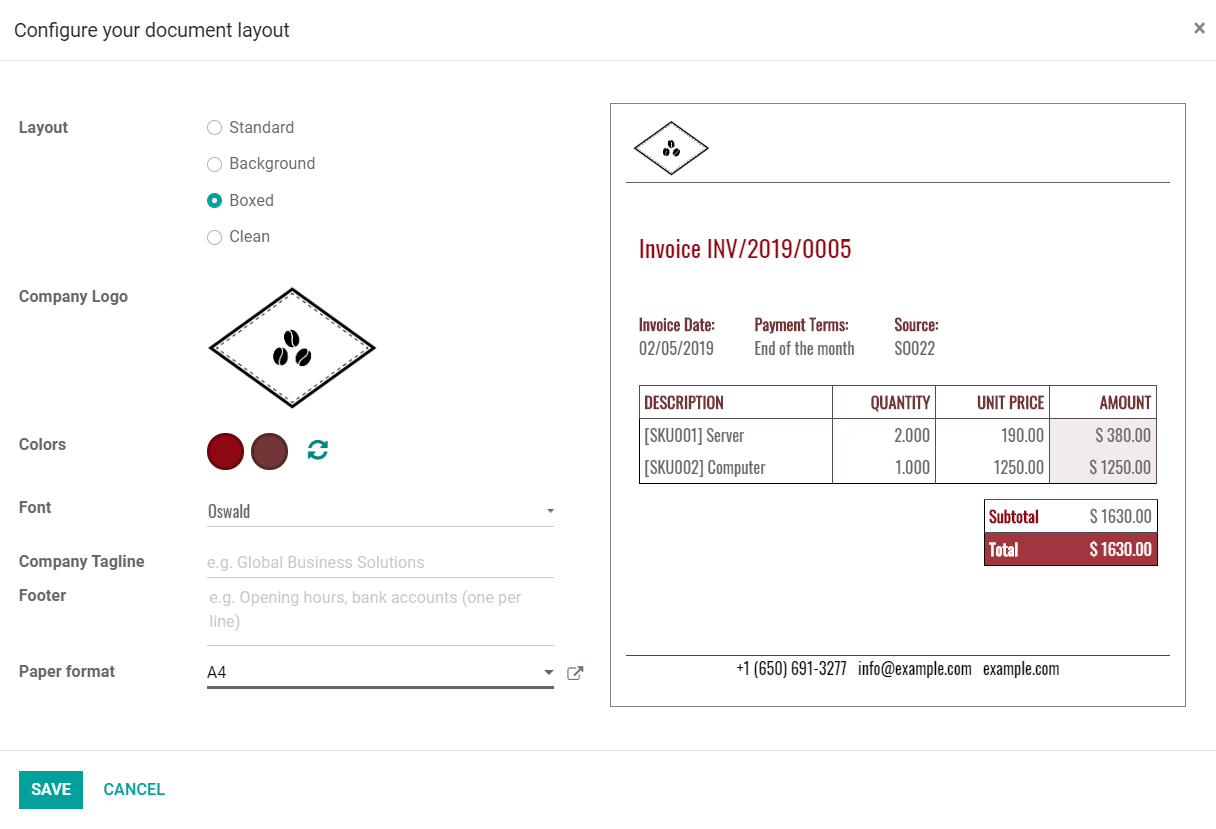
Layout Facture
With this tool, you can design the appearance of your documents by selecting which layout template, paper format, colors, font, and logo you want to use.
You can also add your Company Tagline and the content of the documents’ footer. Note that Odoo automatically adds the company’s phone number, email, website URL, and Tax ID (or VAT number) to the footer, according to the values you previously configured in the Company Data.
Astuce
Add your bank account number and a link to your General Terms & Condition in the footer. This way, your contacts can find the full content of your GT&C online without having to print them on the invoices you issue.
Note
These settings can also be modified by going to , under the Business Documents section.
Moyen de paiement
This menu helps you configure the payment methods with which your customers can pay you.
Important
Configuring a Payment Acquirer with this tool also activates the Invoice Online Payment option automatically. With this, users can directly pay online, from their Customer Portal.
Exemple de facture
Send yourself a sample invoice by email to make sure everything is correctly configured.
Voir aussi
../../fiscal_localizations/overview/fiscal_localization_packages